Well, I finally finished and photographed the afghan! I haven’t yet blocked it, though.
I used the pattern for the Yarn Clouds Square (find it here), however I only went through 11 rounds.
I made 8 full squares and 6 half squares. I had intended to make 4 quarter squares for the corners, but I ran out of the purple yarn. Therefore, my corners aren’t pointed.
I turned the squares on point (with a column of 3 diamonds on the right and left and a column of 2 diamonds in the middle) and used the half squares around the outside to make the edges straight.
I used the Flat Braid Join (instructions here). For instruction on how to join the squares, halves and quarters, refer to this page at the same site (it’s a different afghan and a more elaborate join, but you’ll be able to see what order to do things). Also, at that site, you will see a placement diagram, my blanket basically consists of squares 1-8. My chain length for the braid was 7. For the corners, I put the join in between dc 4 and 5. On the sides, I put the joins in the 3rd dc of each cluster.
I finished with a simple single-crochet border. Again, this was practical, as I was almost out of the white yarn.
Unblocked, the blanket measures 3-feet wide and 5-feet, 1-inch long. Each square measures a little over 16 inches, point to point.
I used Red Heart Super Saver yarn in the colorways: Soft White and Wildflowers. My hook size was K-6.5mm.Half-square and quarter-square guidelines can be found below the photos.I couldn’t get the whole thing in the picture. The felines were bristling at the thought of being displaced. At the very bottom is a half square: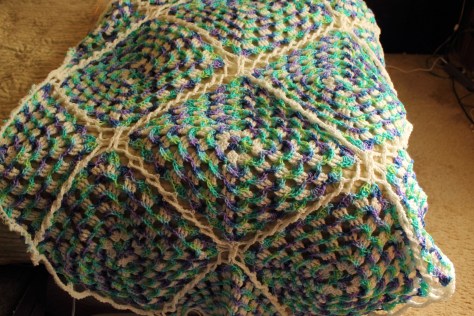 Half-square:
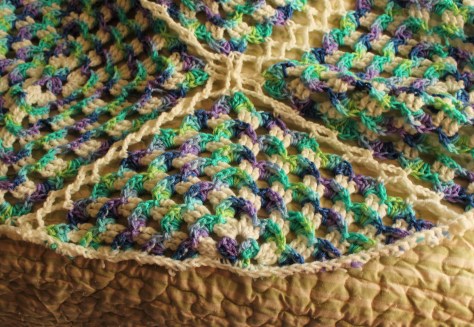 55mm lens cap for perspective:
 This one was taken at my desk, in horrible lighting, with my phone. The colors are absolutely not correct. But, it gives you an idea of the construction for the quarter square.
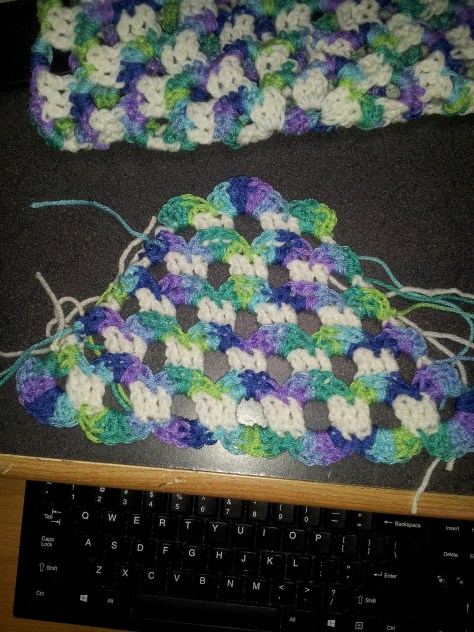
Since I have not obtained permission to recreate the Yarn Clouds pattern, I am just going to post my notes on how to alter the pattern to make half and quarter squares. You will need to refer to the original pattern to know how to work the stitches.
Half Square:
You will be changing colors with each row and you will not turn your work – keep the right side facing.
With purple, chain 5 and join to form a loop. Chain 4. In loop: 3dc, ch3, 3dc, ch1, dc. Fasten off. What you have here are two groups of 3dc, flanked by a ch1 space and 1dc on each end.
Join white, working into the ch1 space on the end, ch4 and then work 3dc into the same ch1 space. Chain 2 and skip the next 3dc. Working into the chain-3 space, 3dc, ch3, 3dc. Chain 2 and skip the next 3dc. In final ch1 space, 3dc, ch1, 1dc. Fasten off.
For the next 9 rows, you will be working the same way you do for the squares. The purple shells will be worked into the chain spaces (with the center ch3 space being treated as a corner). And the white will be worked as bpdc, with the same spacing as the original pattern. Again, as in the original pattern, you will work the apex the same as you would the corner.
The only difference, is in how you will handle each end.
At the beginning of each purple row, you will ch3 (1st dc) and then 3dc into the ch1 space left by the white. At the end of the purple row, you will work 4dc in that chain space.
At the beginning of each white row, you will join the yarn between the 1st and 2nd dc and then ch4 (this counts as dc and ch1 space). You will then work across the next purple 3dc, as in the pattern. To end the white row, you will work through the purples like you did at the beginning, ch1 and then dc between the last two dc.
Quarter Square:
Things are done much the same way. Working in rows, change color after each row, do not turn your work – right sides facing all the time.
With white: Chain 38, dc in 6th ch from hook and in the next 2ch. Chain 2, skip 2 chains, dc in the next 3 chains. Chain 2, skip 2 chains, dc in the next 3 chains. Continue this until you have 6 groups of dc. Join to end. The end loops constitute your dc and ch1 space.
Again, really, the only deviation from the original pattern is that you have ends that you are working (just like with the half square).
The purple ends consist of 4dc (ch3 and 3dc at the beginning) in each of the white ch1 spaces.
At the beginning of the white rows, you will join with back post stitch to the 3rd dc and ch4 (counts as dc and ch1). At the end of the white row, chain 1 and join with a bpdc to the 2nd dc.
You will do this until you have 5 rows of white and 5 rows of purple. One exception: on the top row of purple, you will work 8 dc into that center “corner” space, still putting 4 on each end. I did not make that white chain space bigger, you can if you’d like.
Now, you’re going to turn the whole thing 180-degrees. You will now be working over the original foundation chain. Keep it right side facing!
Join purple. You will be working similarly to the pattern, again. The only difference being the ends. Work 8dc into each end. Treat the rest of the row as you would any other in this pattern.
You will end up with a triangle with 8dc at each point. You should now have a total of 11 rows, 6 purples and 5 whites.
I’m really not a pattern writer, I’m afraid. And I hated having to be so vague. Hopefully these instructions make sense. If you have any questions, I’m happy to help.


