Grandson Baptismal Blanket

Most of you know the story about my grandson; it’s pretty much all I’ve talked about on this blog for the last few months… He will be born and will die soon afterward (if he survives his own birth). My son and his fiance decided that they are going to have him Baptized as soon as he is born. I knew I had to make his Baptism blanket.

Christening Blanket 5

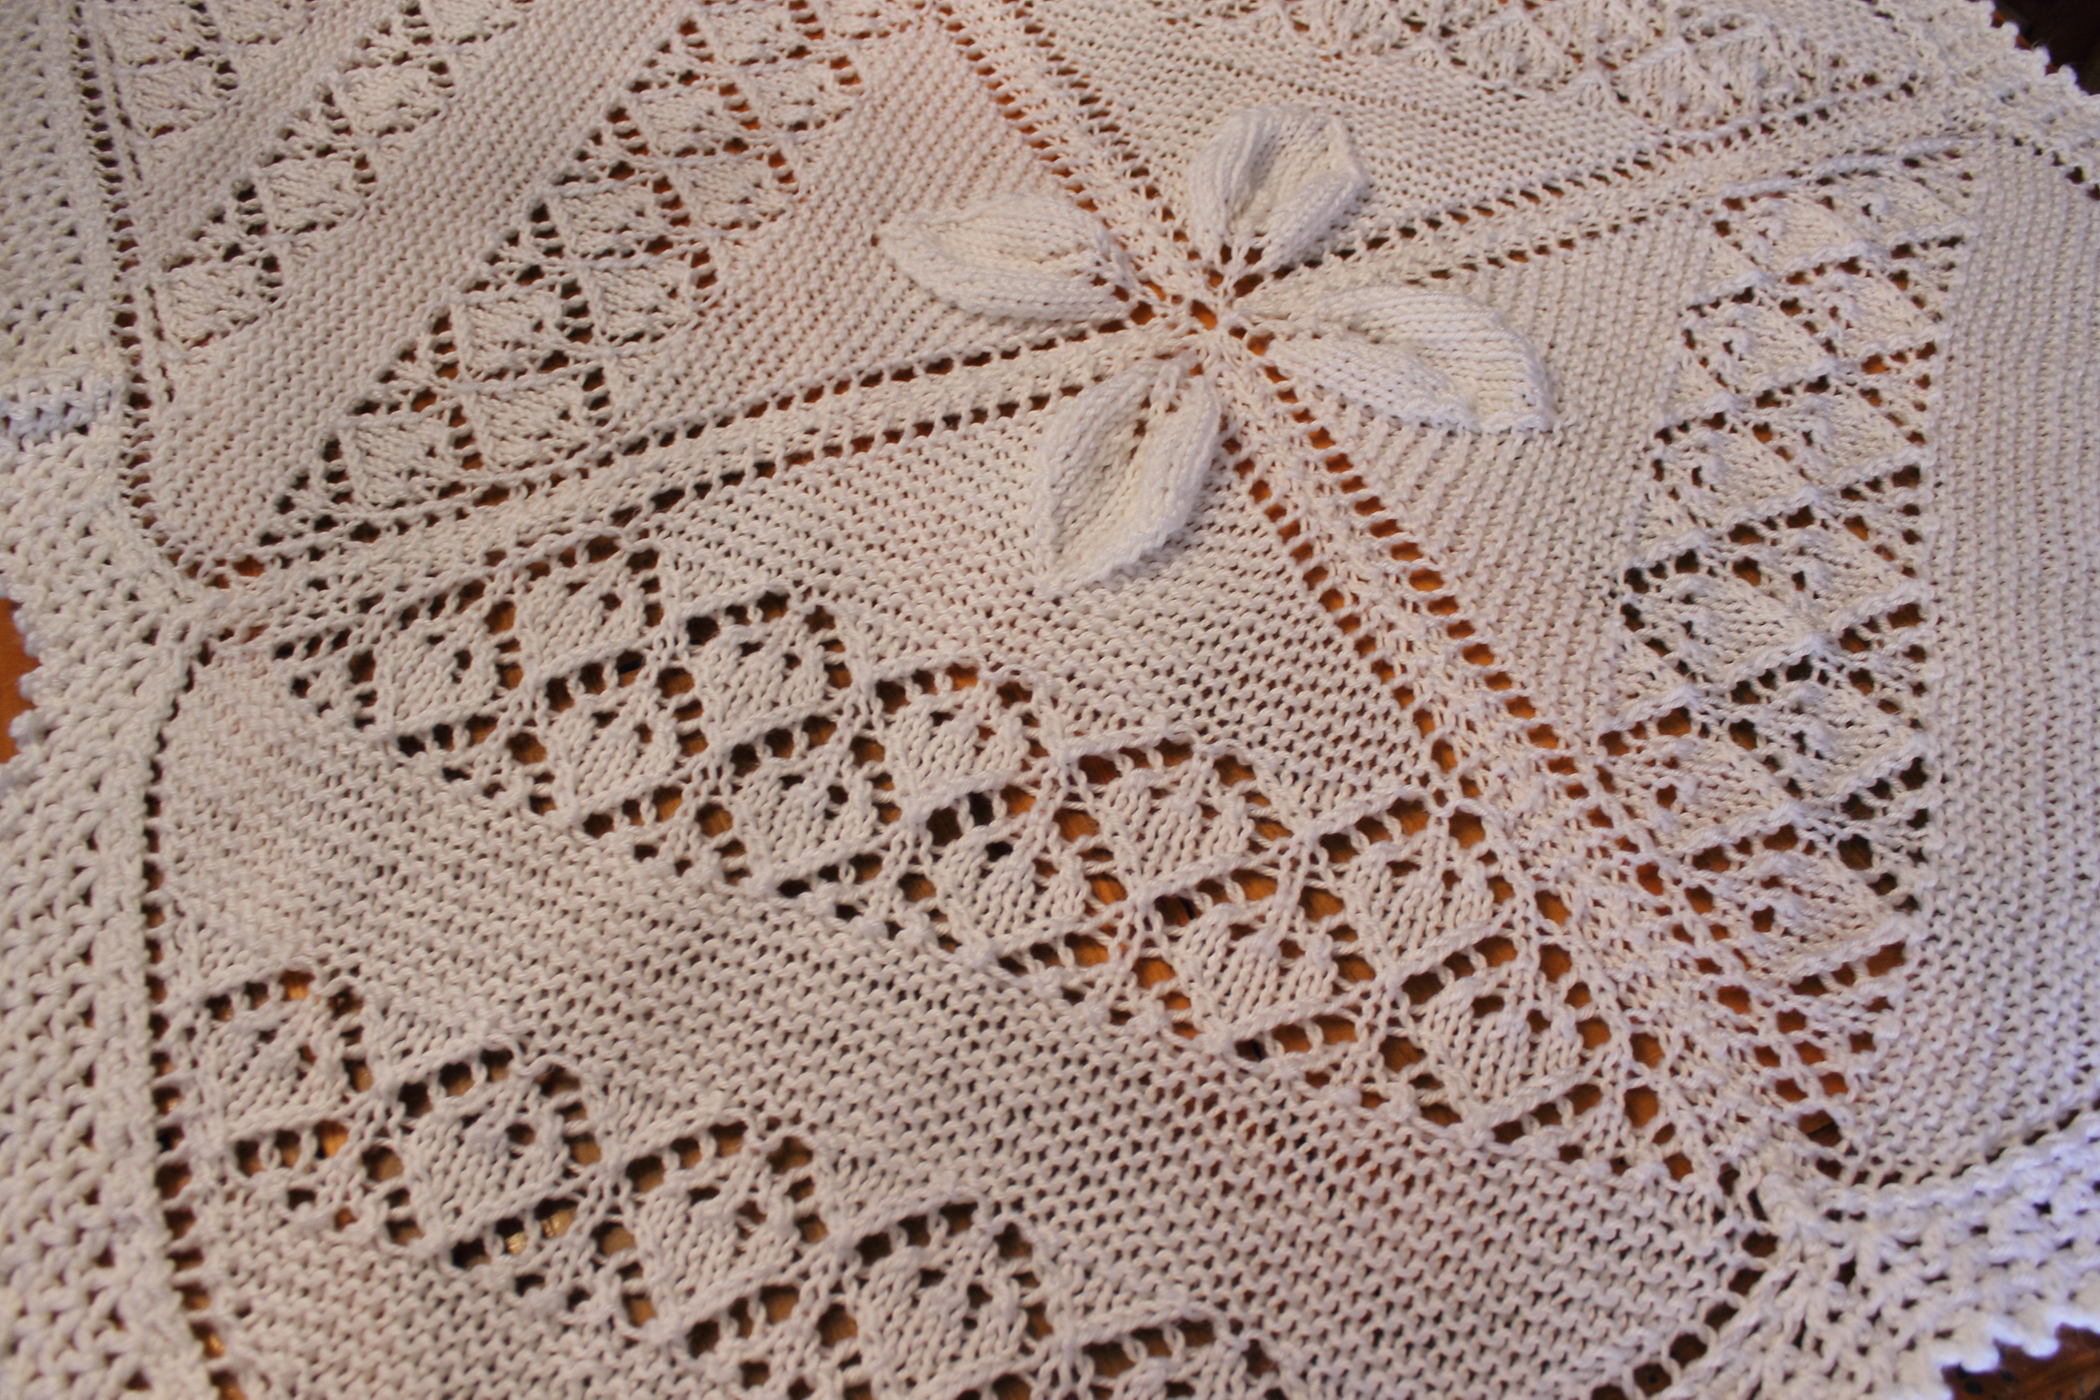
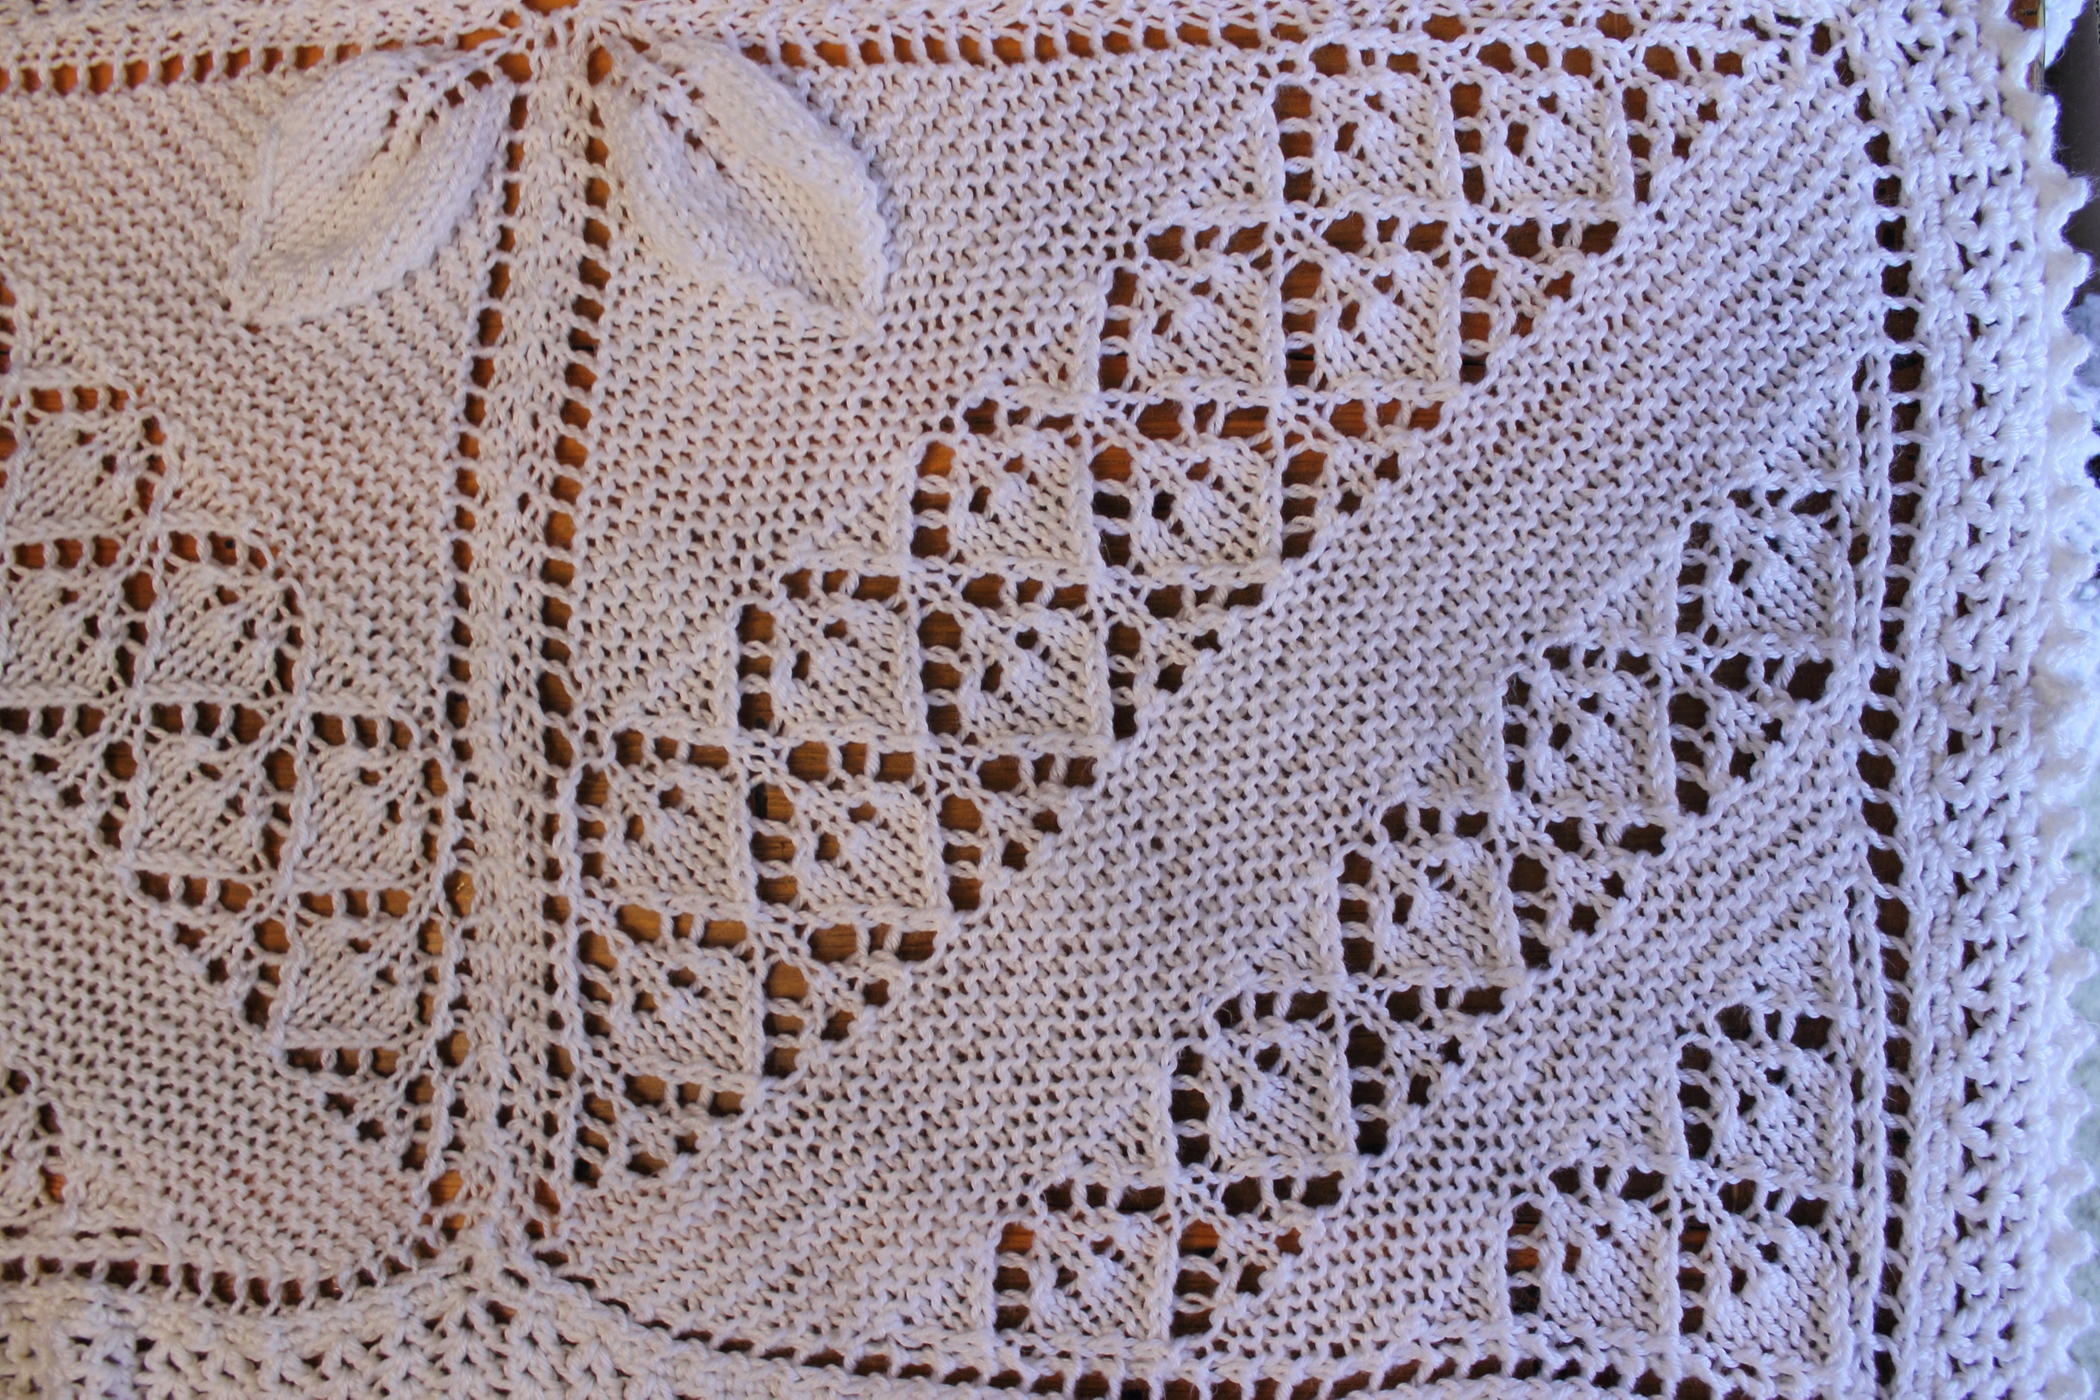
I used the Baby Counterpane Christening Blanket pattern written by Kay Meadors.

Christening Blanket 3

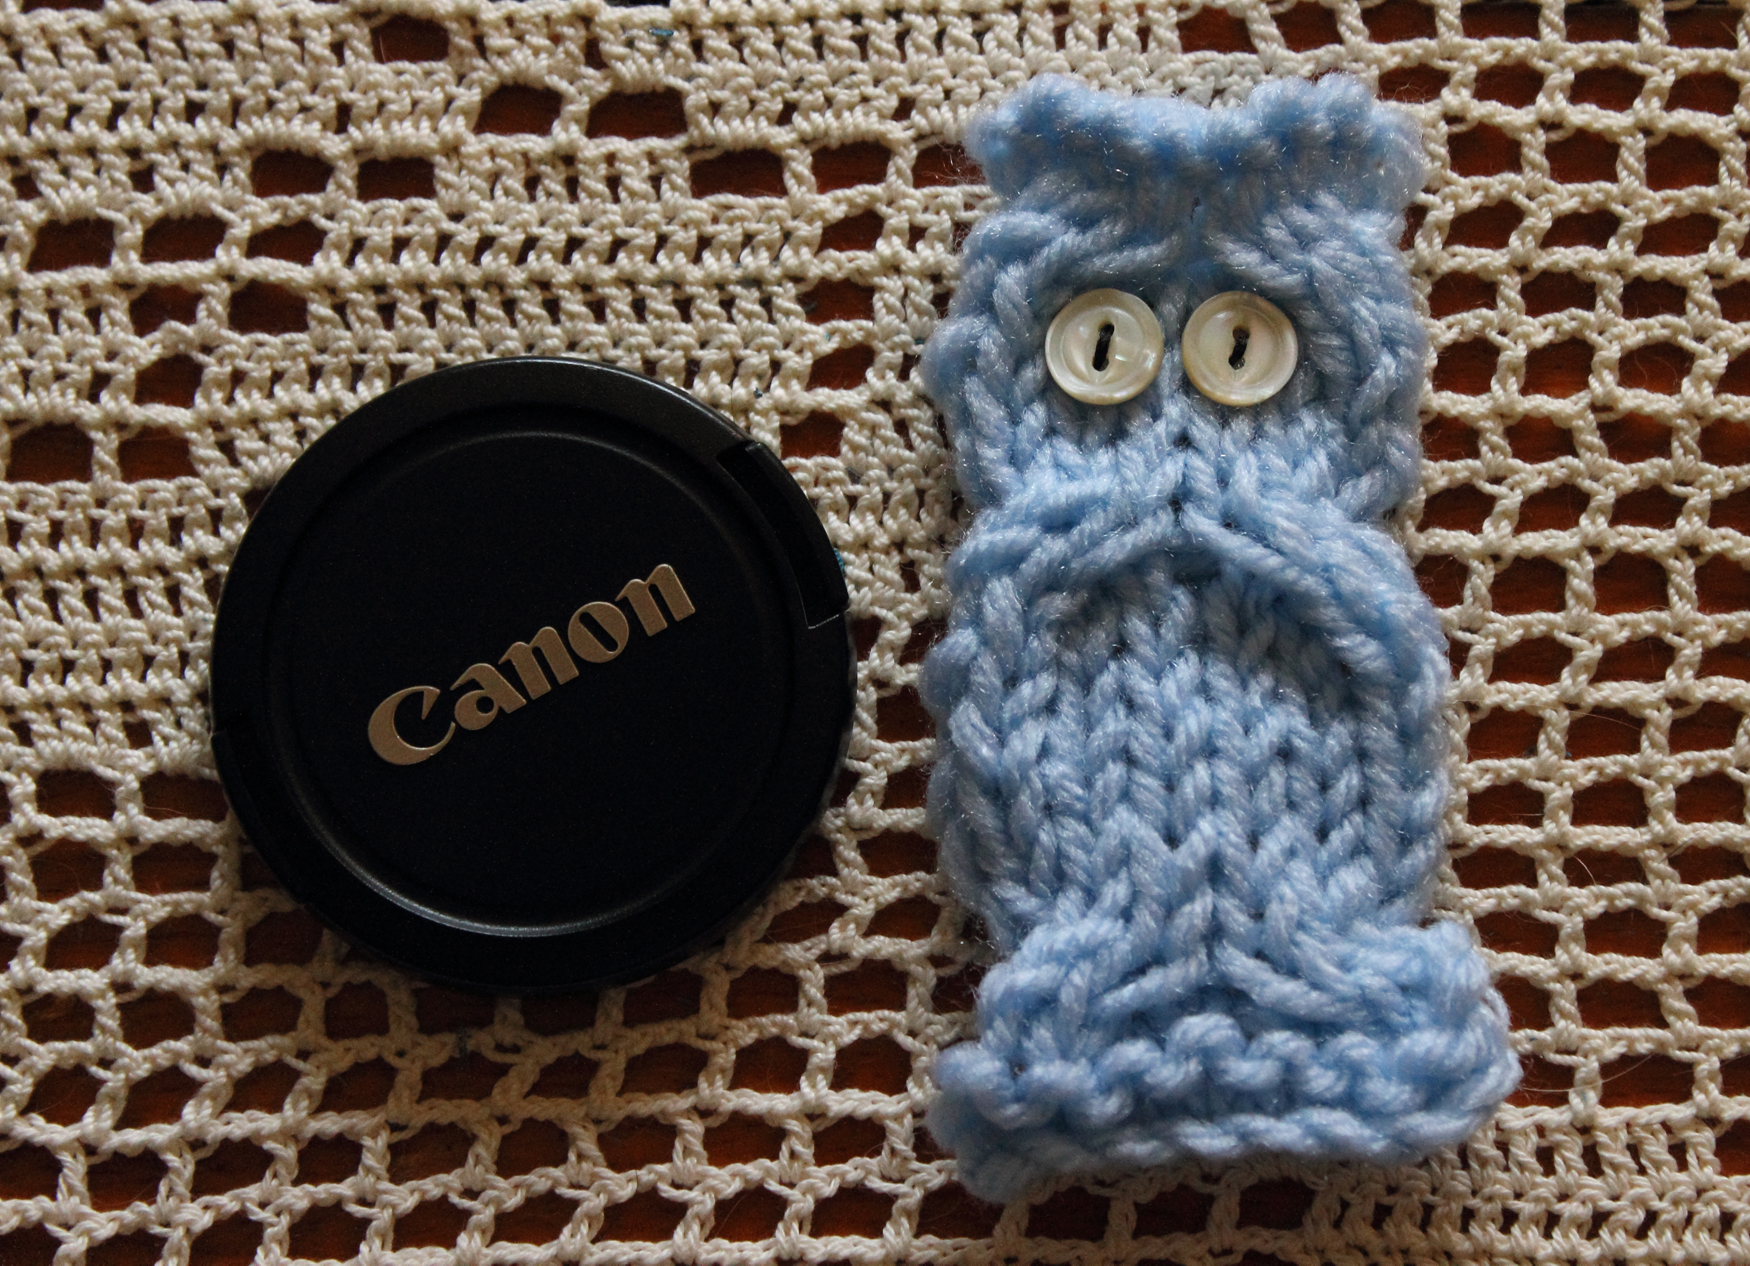
I’m not a proficient knitter; in fact, I haven’t actually knitted much… Two socks, a kerchief, a little decorative owl and a hat. The socks were actually done with needles. Everything else has been done using a knook.

Christening Blanket 6

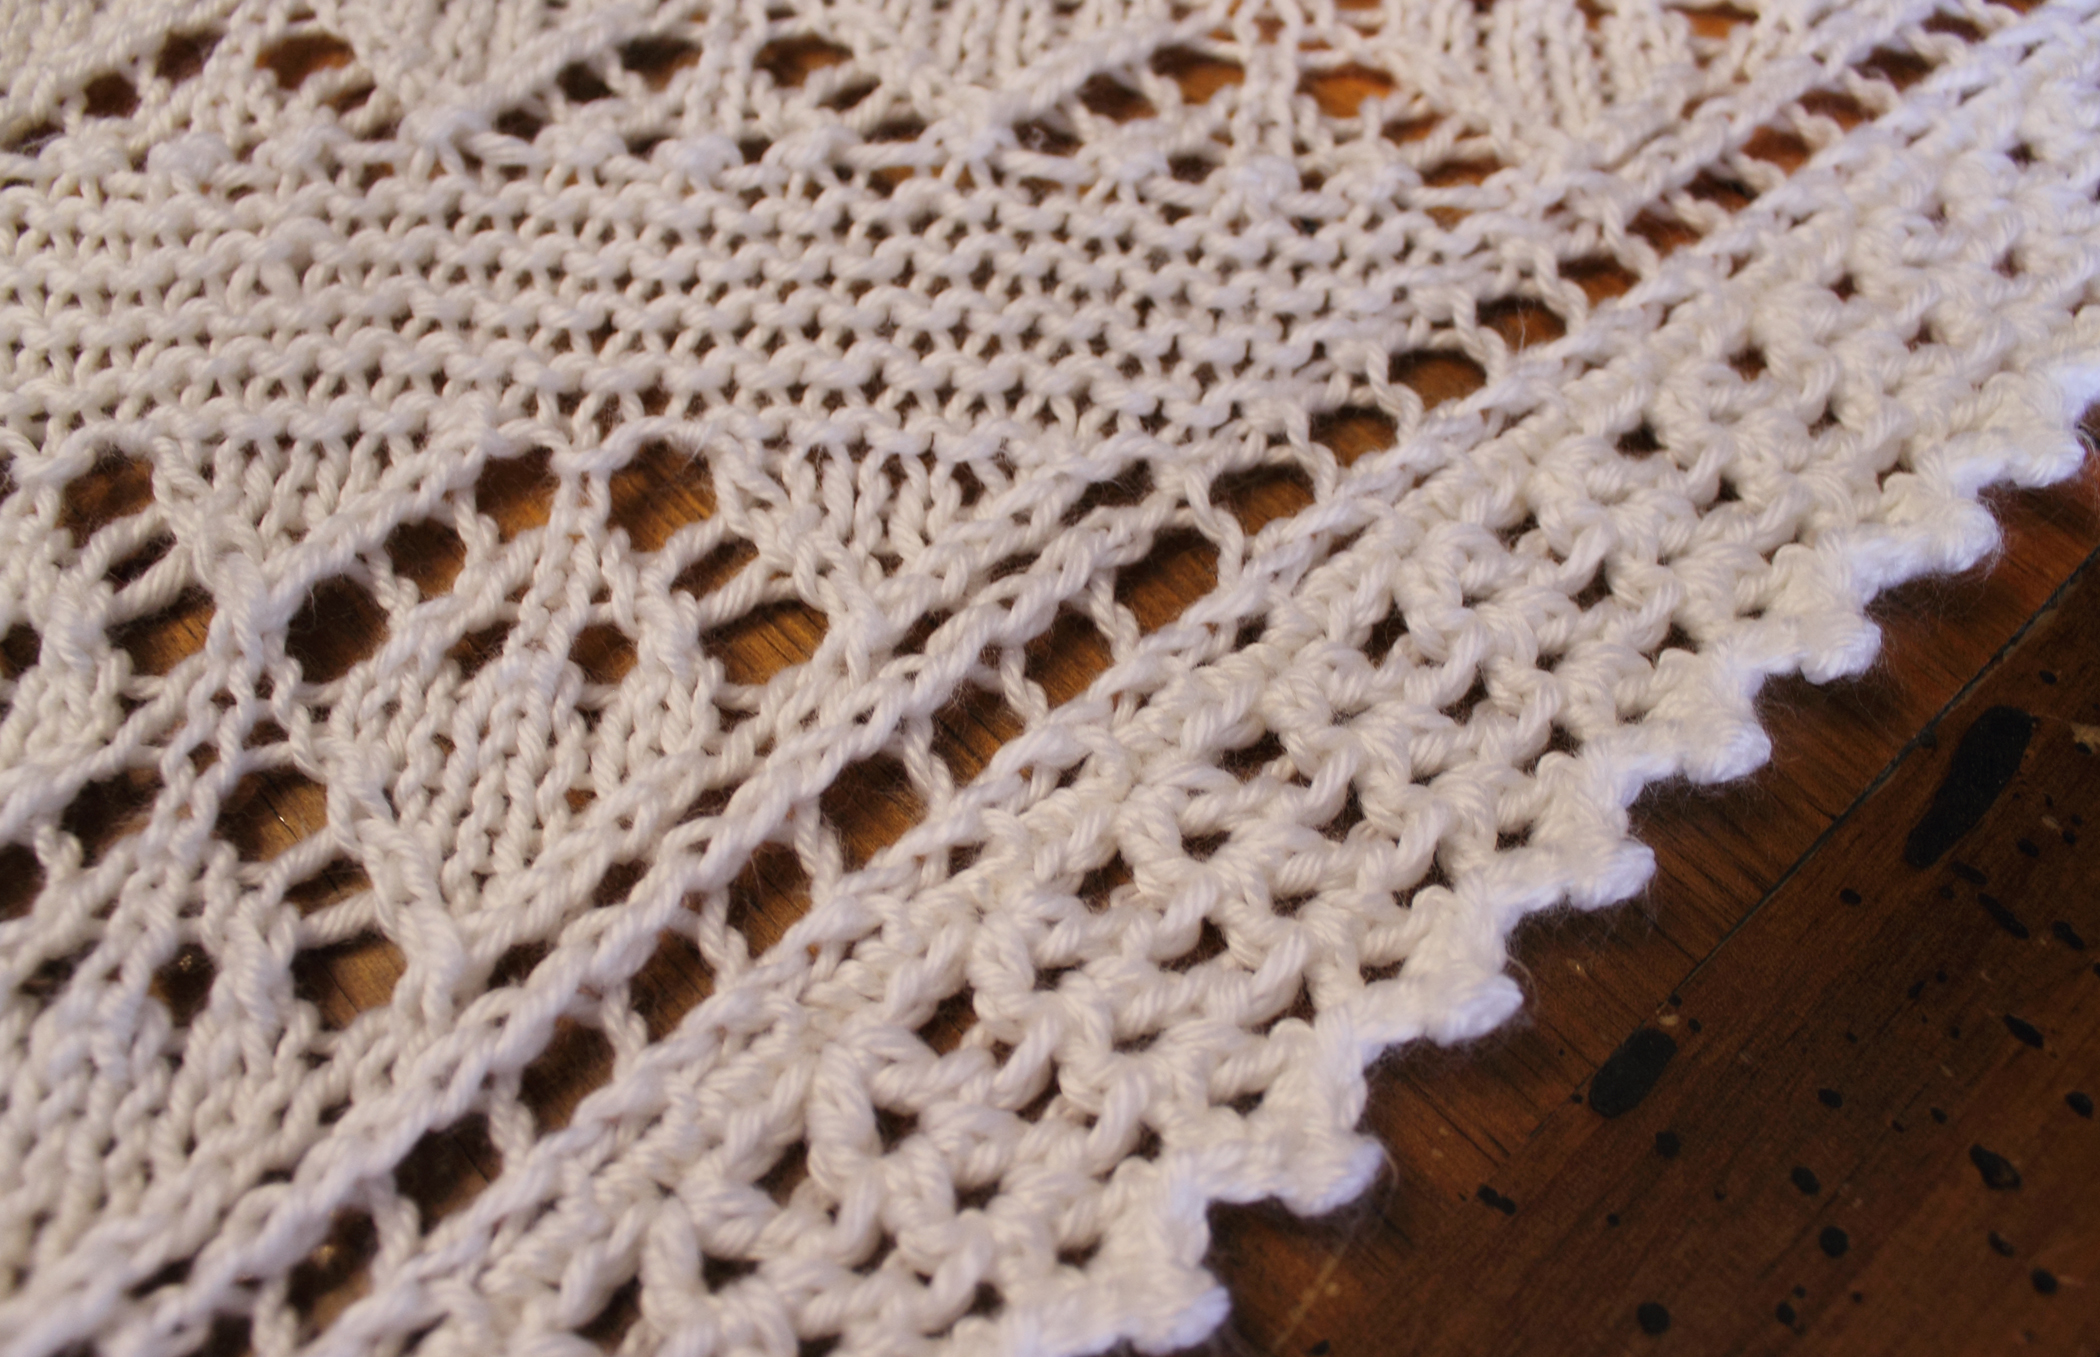
I had some problems with the edging portion of the original pattern. And since I don’t have much knitting experience, I didn’t know what changes I should make, to make it work. So, I frogged the edging and switched to crochet.

Christening Blanket 7

For the edging, I used the Lacy Vs and Picots Edging pattern written by Amy Solovay. Because I had done one row of SC all the way around, I skipped straight to round 2 in the pattern. I completed two rounds of round 2, one of round 3 and then the picot round.

Christening Blanket 1

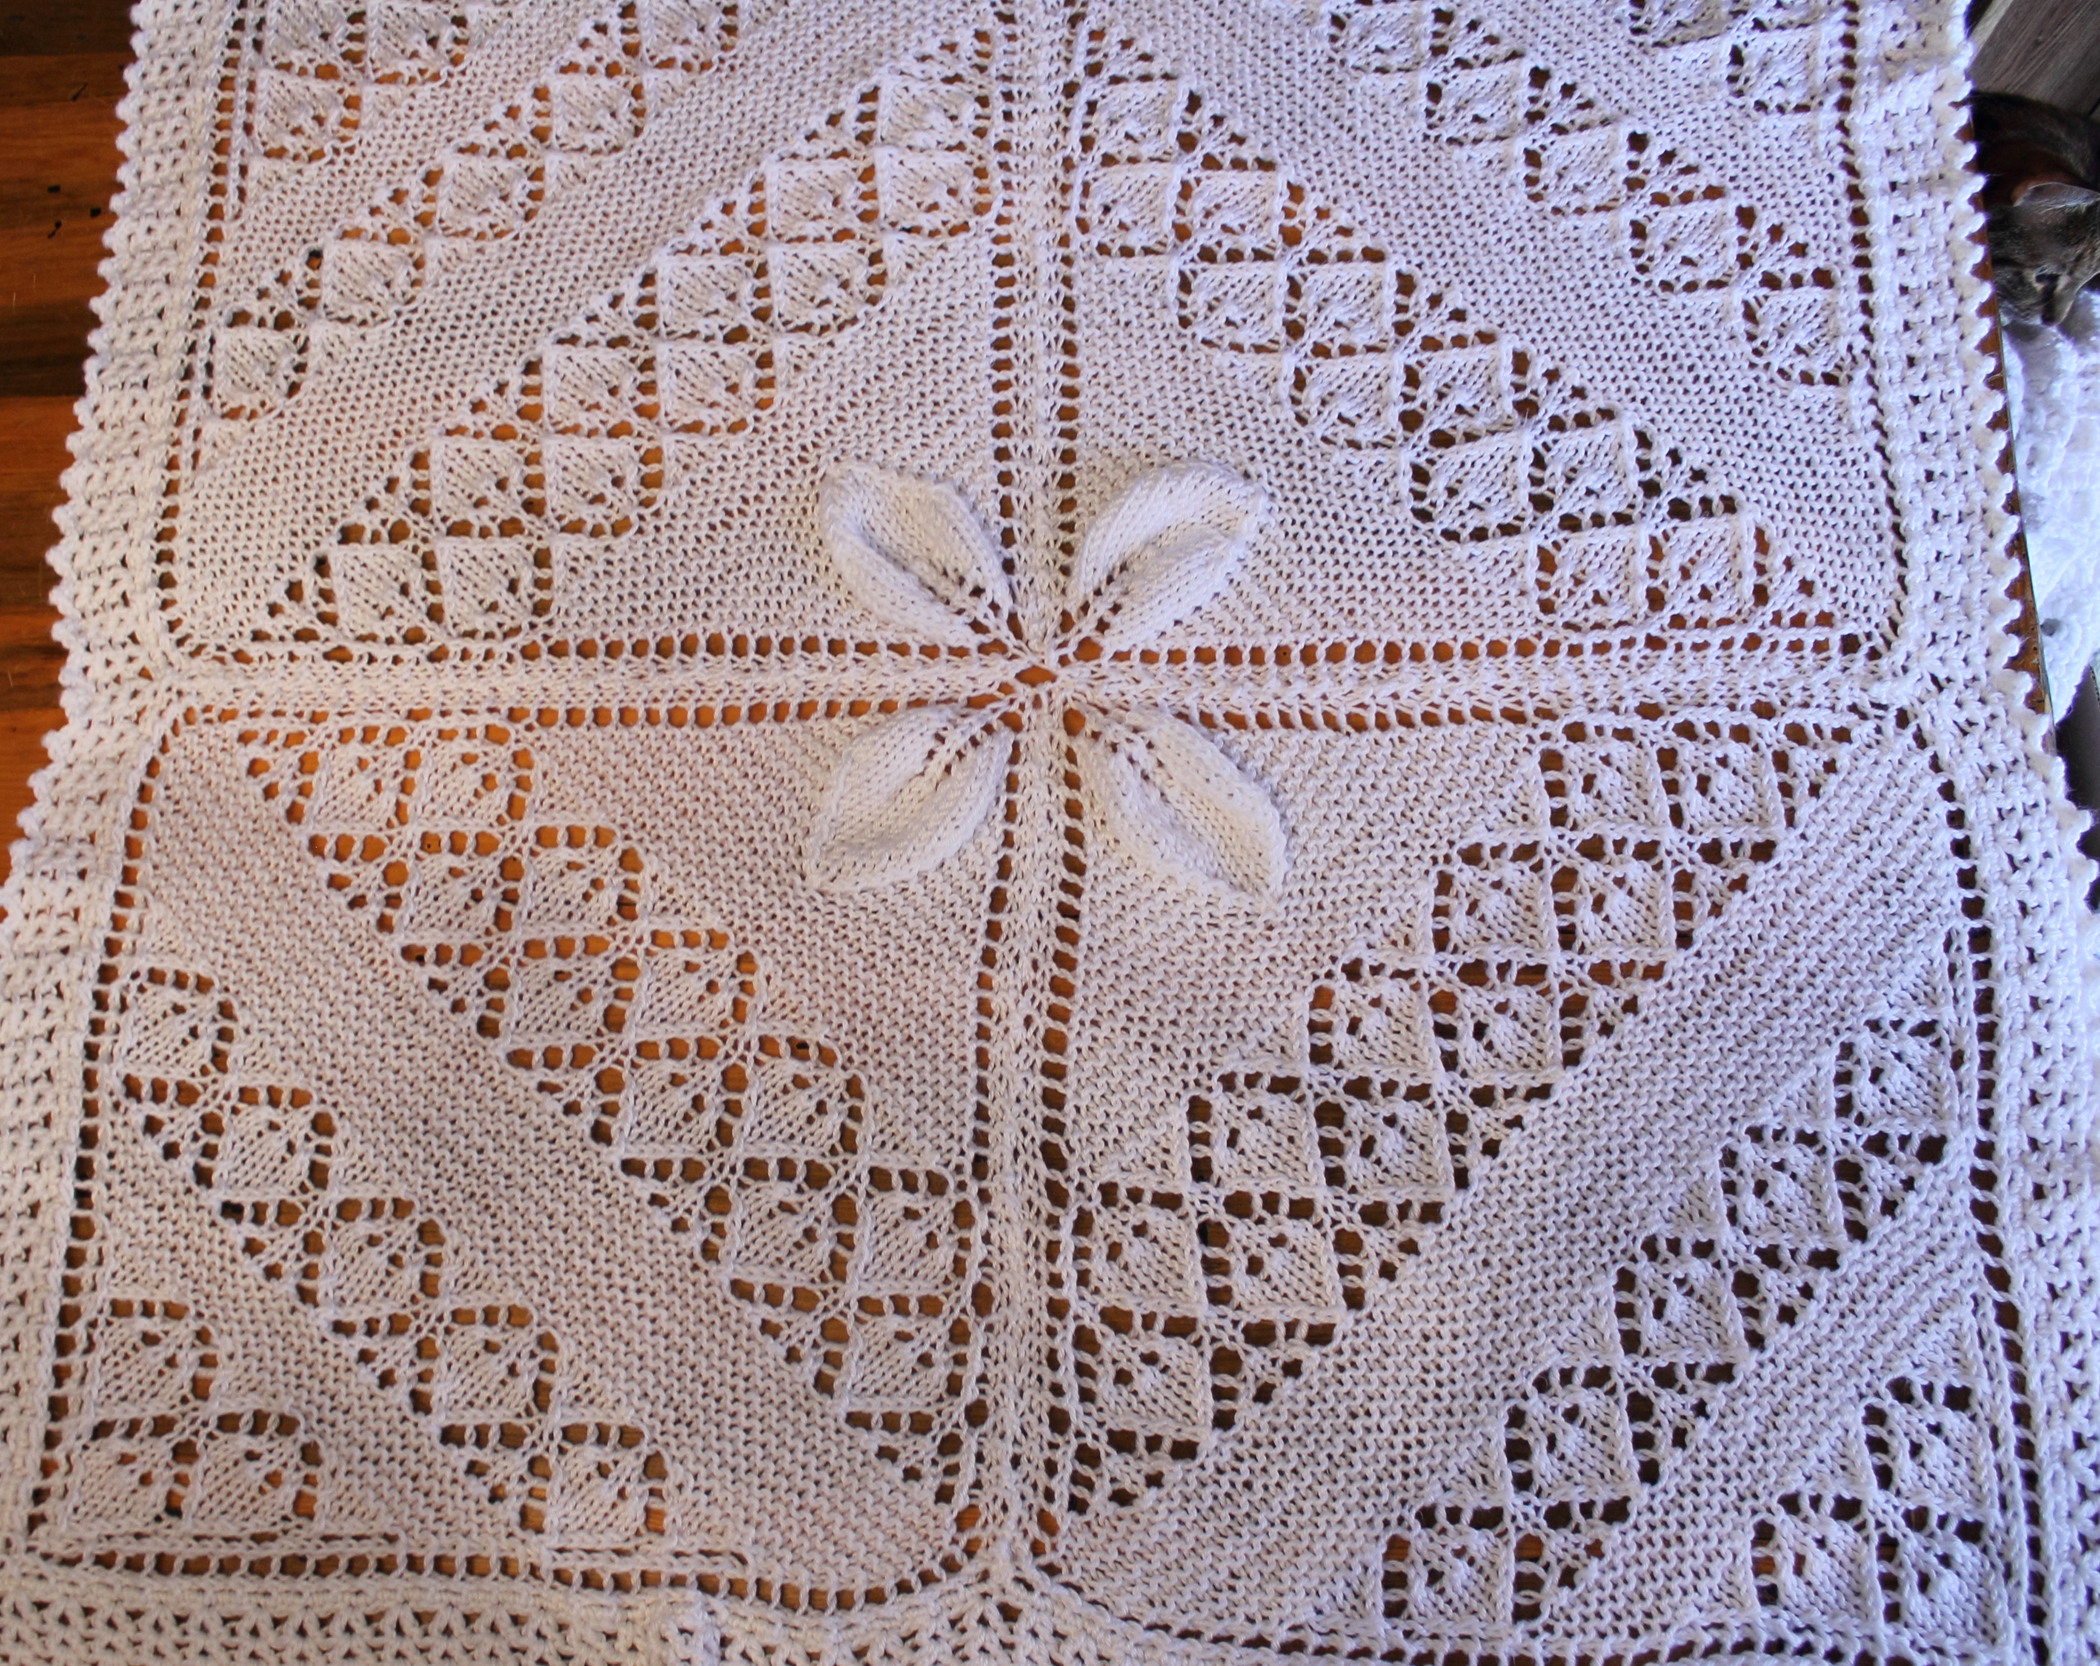
Aside from the fact that this was a sad project, I really did enjoy the process of making this blanket. It was a fun knit, with lots of different things to do. But, because it was fairly repetitive, it was also easy enough. I put in a lifeline every 10 rows. I think it is a great beginner’s lace knitting project.

I used my favorite baby yarn – Red Heart Soft Baby Steps – in white.

Each of the four panes took less than a skein of yarn; I started a new skein for each pane. The edging took the better part of a skein. I started a new skein for the v stitches and then started another for the picot round. I would say that it took five skeins of yarn, even though I opened six.

Because I’m a slower knitter, I’d estimate that this took me close to 50 hours to make.

It is a little over 3-feet square.

Mom loves it, and really, that’s all that counts.

Knooking Tutorial

I have been crocheting for many years; but I’ve only learned to knit in the last few.

I’m beginning to get arthritis in my hands and knitting with two straight needles is pretty painful. I discovered circular needles and that was better – but still a bit painful.

Part of the problem is that I have some needle insecurity issues going on. I’m afraid that my knitting will slip off the needles and I will lose my work. In my experience, this is a valid concern, as it has happened to me several times. In order to compensate for this insecurity, I keep a death grip on the needles. This causes me pain and makes knitting a not-so-fun-and-relaxing experience.

Also, I have always found executing knit stitches and purl stitches on needles to be awkward and un-intuitive. I blame this on the fact that I’ve been crocheting for a long time.

A couple of years ago, I discovered knooking. This is actual knitting, but using one modified crochet hook rather than two needles. This is better for me, as the tool is familiar and it doesn’t cause me near as much pain. I’m not forcing my aging joints to learn new motions.

Unfortunately, when I was first learning to knook (using YouTube videos) the experience was still quite awkward. Forming the stitches took a lot of effort and it was very challenging. As a result, I ended up putting the knook away and just resigned myself to no more knitting.

I did acquire a couple of knitting machines and those are great, but not quite the same as working by hand.

Recently, I decided to give knooking another try. I found a Leisure Arts video on YouTube: click here for video. Evidently, this was a different method of making the stitches and (happily!) I have found it to be much easier than my earlier efforts. This method is called “western” and it is more akin to crochet and most crocheters find this to be the easiest method for them to learn.

Because I bounce back and forth between knooking and crochet, I found that I was forgetting how to form the knit and purl stitches; so I made myself a mini tutorial that I can refer to whenever I need a refresher.

Knooking for right-handed folks:

Getting started: cast on (crochet chain) desired number of stitches, then pick up stitches (working right to left, pull loop through each chain stitch, leaving each loop on the hook). Slide stitches off of hook and onto cord. Turn your work so that the hook is on the right and you’re working right to left, just like in crochet.

Knit Stitch:

Yarn held in back.

Insert hook from left to right.

Knook Knit Stitch 1

With hook above working yarn, grasp yarn and pull through stitch.

Knook Knit Stitch 2

Purl Stitch:

Yarn held in front.

Insert hook from right to left.

Knook Purl Stitch 1

Wrap yarn over top of hook, grasp and pull through.

Knook Purl Stitch 2

After all stitches have been worked, slide stitches off hook and onto the cord. Turn your work and continue as per pattern.

Binding Off:

Knit the first stitch (one loop on hook).

*Insert hook into next stitch (now there are two loops on hook), wrap yarn around hook and pull through both loops on hook (back to only one loop on hook).* This feels like a single crochet, but it is actually just doing a slip stitch two together.

Continue * to * until all stitches have been done.

Cut yarn, weave in ends.

I hope this helps all of you who are interested in learning. Feel free to contact me if you have any questions or need clarification on any of my instructions.

🙂

Hello!

Well, it has definitely been a long time since I’ve posted anything. There hasn’t been much to report…

The kitchen remodel stalled due to health and financial constraints. However, laying of the new floor has begun. Nothing else has been accomplished on the island, but sweetie says he intends that to be his winter project.

I’ve been employed and and am once again unemployed. But really, I’m actually enjoying being home.

I’ve been doing some crochet and knooking.

I finished this crocheted item back in September:

Four Roses Centerpiece

It is 42-inches wide. I intended it to fit one of my coffee tables, but it is much bigger than expected. I’ll need to make something else for that purpose. This will look lovely on my black-lacquer dresser, or as a centerpiece on our dining table. BTW, I have no idea what’s up with the alignment on this paragraph, but no matter what I do, I can’t fix it…

I’ve been re-learning to knook (knitting with a crochet hook) and I learned a different technique. The Leisure Arts way works best for me. I made a mini photo tutorial for myself (being a crocheter I need reminders of how to create the knit and purl stitches because it is similar to crochet) and I’ll make a separate post for that – just in case anyone reading this is interested in learning how to knit with a hook.

I have joined a mystery one-skein knit-along on ravelry. I have no idea what we’re making, but so far this is what it looks like:

One Skein KAL October 2014 2

I’m guessing that it is going to be a hat. Please excuse my imperfect stitches. I’m still learning tension control. I think that after blocking it will look much better.

Before starting the above-mentioned KAL, I knooked this little guy up real quick:

Owl

I absolutely adore him! I have no idea what I’m going to do with it… Just add it to the owl collection, I guess.

In addition to the KAL, I am also working on a crochet project. Here is the chart:

Pricilla Filet Peacock Chart

This thread beast is going to be huge. This photo was taken after the first ball of thread was gone:

Peacock First Ball

Unblocked, it measures 53-inches wide. I believe that the unblocked finished object will fit our dining table. I’m going to finish it and decide whether or not I want to block it. I will post photos with each ball of thread used.

I hope this post finds you and yours well. I’m off to make a knooking tutorial!

12-Stitch Machine Knit Gingham Chart

Hello!

I know that it’s been a while since I posted, but I’m sure you’re all used to that by now… It has been a bit of a whirlwind of activity around here…

I’ve started working 4 days per week for the company that I previously worked for. It’s been good. Part time has been agreeing with me. I do enjoy having 3-day weekends, for sure.

Last weekend we had a severe freeze here and the heater in the pump house couldn’t keep up. The well head froze. Thankfully, we were able to save it, several hours later. We really thought we were going to have to buy a new pump. SOOO glad we didn’t! We had a couple of burst pipes under the house and a couple of our drain pipes froze – 2 burst; thankfully they were just drains and not water pipes. We had the plumber out yesterday to fix them.

I received my “new” knitting machine and have enjoyed playing with it. One of the patterning drums is missing a tooth and the gal I bought the machine from is sending me another carriage that I can cannibalize for parts.

It’s amazing how much faster fair isle knitting is on the machine! I’ve been having a few operator issues when doing colorwork, but I think I’m learning pretty well.

For my kitchen curtains, I want to do a gingham check along the bottom of the panels, so I came up with a punch card pattern to accomplish this task. The rest of the panels will be in a tuck stitch pattern. This will keep the curtains a solid panel, but will give them some interest.

Here is the gingham check punch pattern that I came up with:

12st Gingham Pattern Chart JPG

And here is the PDF

12st Gingham Pattern Chart PDF

Enjoy!